Tuesday, June 24, 2014

Week 10 Day 1

Today the electrician came to finish up all the items he needed to work on, the plumber came to install all the (wrong) faucets, and the floor guys came to fix the doorway slats.  I think of all the days, this was the loudest one yet with everyone downstairs sawing, nailing, vacuuming, etc.


The floors look much better now!  The guys were great about getting this done, asking for my opinion before they left, and when the Mister saw it last night he commented on how it now looks like it should.  We are both very pleased now with what was once not very pleasing to the eye. 

So I keep saying something fun was happening in this little nook of the kitchen.  Today I can reveal part of it!  His/Hers drop stations.  We will each have a drawer where we can drop our keys, phones, etc. and the clutter will be contained.  If you ask the Mister what is is most excited about this is it!  Well this and the dishwasher (queue we are both over handwashing in the bathroom sink.)  We may even sneak down and charge our phones here tonight just because we can.

Under the island there are two sets of plugs. This will allow someone to plug in a laptop and work at this space without having cords across the floor for people to trip on.  It will also provide convenient plugs for crock pots, hot plates, etc. when entertaining.  


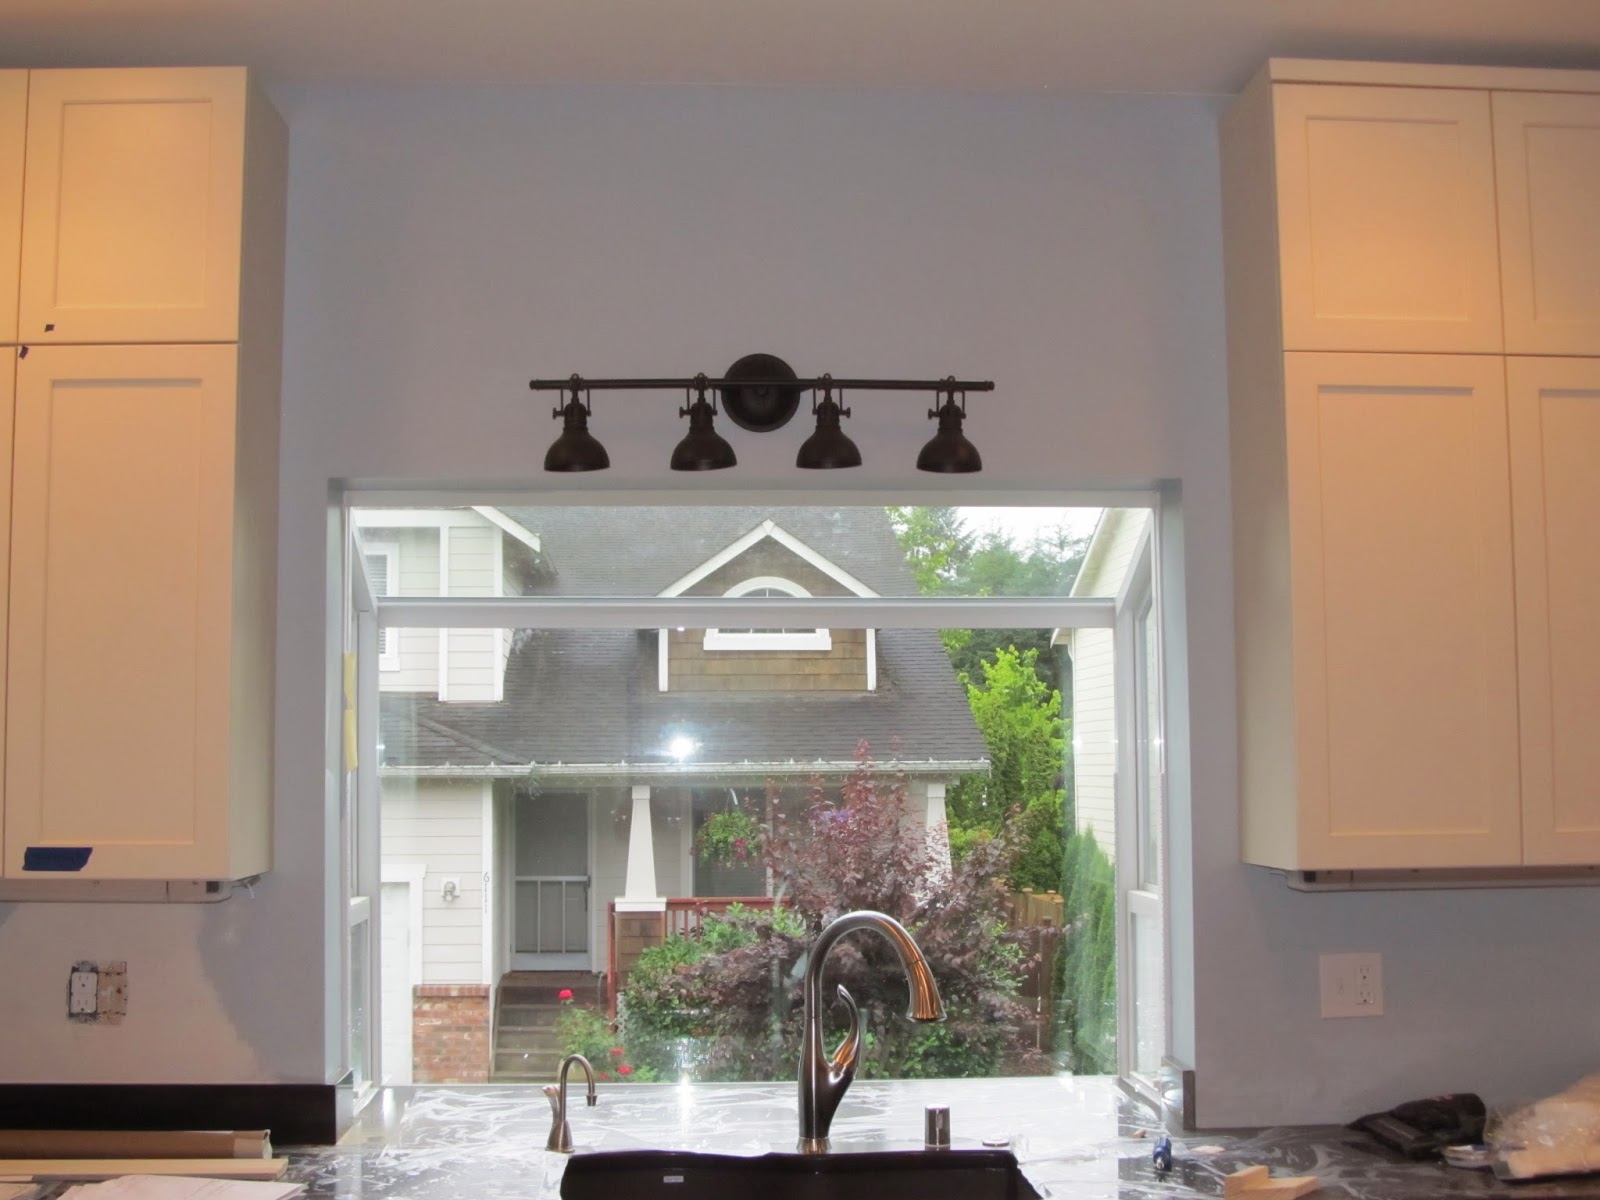
After returning the light I was in love with but was too small for the space, this is the light fixture we ended up with for over the sink.  Of all the areas where I wish I could go back and have a do-over this is it. I would probably have done two pendant lights over the sink area, but I think once I get some art work (I am thinking 3-4 8x12 pictures over the light) the space will come together nicely.  We also still have the option to do a shelf over the light if we wanted to go that route.  
If you look at the cabinets on the right, you can see where the upper trim installation has begun.  There will be an additional piece of crown molding over this to finish off the cabinets to the ceiling.

Fauctes and garbage disposals and instahots...oh my!
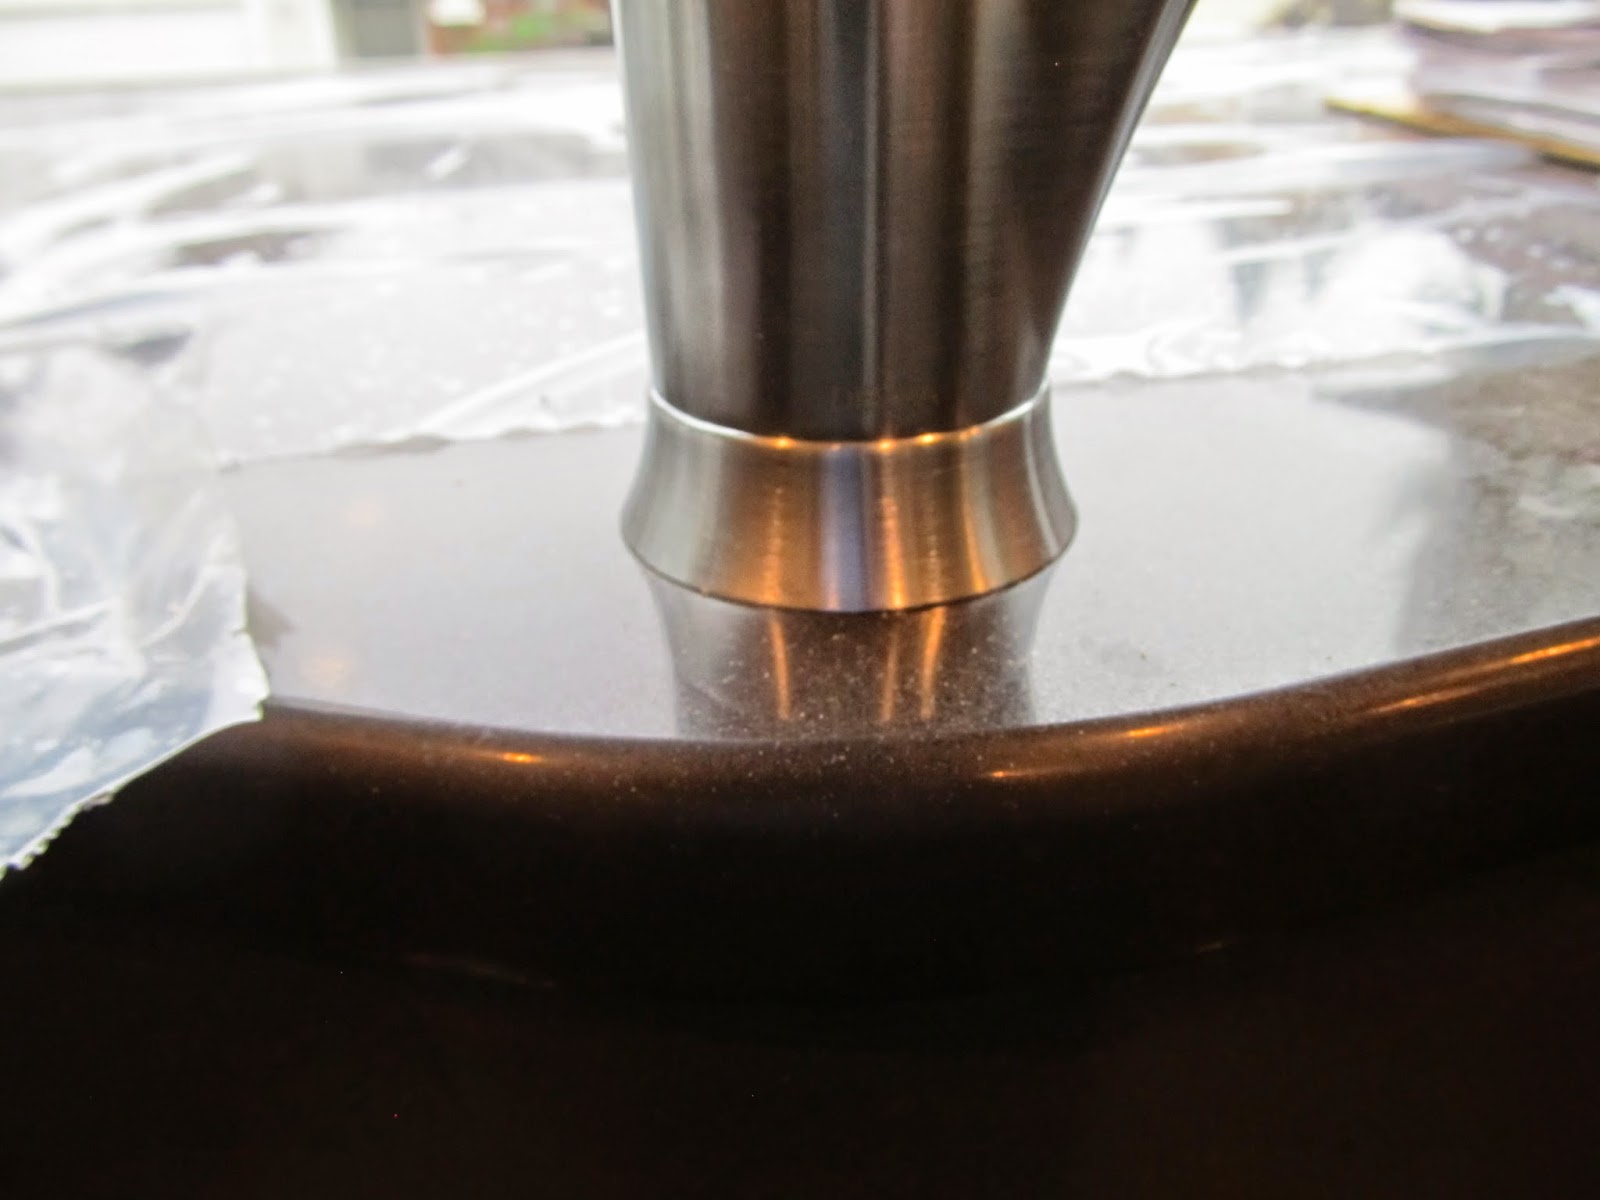
 A close-up of the air switch which controls the garbage disposal.  We were excited to learn there is an option other than the light switch.  With this button (there is one at each sink) you can turn on/off the garbage disposal without wondering which light switch you should flip. Also, note the close up of the quartz pattern used on the island.
The instahot.  True to its name, when you flip the hot switch, steaming water comes out.  Insta-ramen noodles anyone?  Insta-hot chocolate more your style?  Just don't burn your mouth!

So for this week's "oops" moment, one of the things we upgrade on in the kitchen was faucet that could be turned on/off by touch.  After looking at Delta and Kohler versions, we decided to go with the Delta 2.0 version. My friend K even recommended it because she has one and is happy with it.  So last night we go into the kitchen, turn on the faucet, touch it ... and it stays on.  Hmmm... So we look at the instructions, the boxes, and start thinking these are the wrong faucets.  So I look back at our plumbing addendum and we signed off on the 2.0 versions.  So I look at the model numbers.  Apparently the 2.0 and the original version have one character different in their model numbers.  OOPS!  So, we have faucets.  They are the right style (so they will look the same) but they are missing the touch functionality.  No worries, phone calls are being made and this will eventually get resolved.


K was kind enough to send me a shot of her faucet so I could see the light which indicates battery power for the touch functionality.  You can also see by her wall color and countertop color that we are friends for a multitude of reasons.  :-)
   

Week 9 Day 4 & 5

The Mister and I were able to get away for a long weekend, so I don't have exact pictures of when things happened between days 4 & 5 so I'm going to do one long post.  These days were quite exciting from a progress standpoint so I hope you enjoy the abundance of pictures this post will bring.

It is hard to get a good picture of the wood floor markings that were made to deal with Issue #1, but if you look at the 4th boards down, you will see three is a faint verticle line in the middle of a piece of wood where the grain doesn't change.  I think once all the floor coverings are up, I can get these markings stained slightly darker and sealed, then all will be as good as it's going to be considering we went for a compromise.  Knowing the limited amount of original hard wood we had left to work with, I honestly think in the long run this was probably as good of a solution as the other.  So, yeah... live and learn.

In the below picture you can see faint lines that were made in the boards following the pattern.  Again, they need to be slightly darker and sealed, but that's a project for another day.

We have countertops! Woohoo!  Also, under the cabinet lighting is peaking out if you look closely.  This will be hidden behind trim eventually, but for now shows itself proudly in person.
 The oven doors are now installed.  There will be an additional piece of trim that goes above the top of the oven to close in that gap.

Look at all the counter space.  So exciting!!!  Also, I never quite understand why some drawers go missing... I just assume they will show up at the appropriate time.
 The prep sink and the cooktop are in.  It will be so exciting to walk in from the backyard with fresh produce or turn from the refrigerator and prep items right for cooking in this area.
And here's a before and current progress picture.  The refrigerator is still in the way to get the full view, but here's an attempt:


And for a little outside housekeeping, the underboard of the new window was installed.  It looks like some additional trim needs to take place to finish this off, but all in all progress is happening.


Week 9 Day 3

Oops...I didn't mean to leave you all hanging.  Apparently the floor issue just kind of got to me and I forgot to come back with updates.  Wednesday afternoon, our production manager, lead carpenter, the Mister, and I met to discuss what we weren't happy with in regards to the floor.

Issue #1: The floor between the dishwasher and the island was replaced with long planks not mimicking the pattern of the rest of this space.

Resolution #1: Jason (our lead carpenter) proposed taking a small tool and making divots in the wood to mimic where the pattern would fall, then staining them slightly darker than the wood to give the appearance of the pattern the rest of the flooring exhibits.  We agreed that this sounded reasonable so he is going to give that the "old high school try" (his words) and we'll see how it goes.  If that doesn't work, then we will have that flooring replaced.  Since we plan to have the floor sanded down and re-stained and sealed in the future, all the divots will go away and this will become a non-issue. It will be a little obvious if you really study the floor that there is a section where the wood grain doesn't change, but keeping the illusion of the pattern will go a long way to resolving this situation.

Issue #2: The floor in the enlarged entry was laid with small pieces of the new hardwood and doesn't blend with the existing floor.  Since there are still pieces of the original hardwood left, we were perplexed as to why this shortcut was taken.

Resolution #2: Have the flooring guys come back and replace the short, dark pieces with longer pieces of the original floor.

So, there you go. It was a great meeting and we were very pleased to be able to work together to come up with solutions that will make everyone happy in the long run.

And without further delay, here's the latest and greatest installation into the kitchen.  The bottom cabinet opens up (I'll take a picture of that later) and gives a lot of storage for larger items above the refrigerator.  So with this, all the cabinets are installed!  YAY!!!!  Next up...counters and trim.


Wednesday, June 18, 2014

Week 9 Day 2

To spare you after yesterday's novella today I bring you framed in refrigerator space  Goodbye blue ladder, looking forward to seeing that space with one more cabinet and a refrigerator below!


Week 9 Day 1

One of the things I vowed to do in this whole progress was to report the ups and downs of this remodel as honestly as if you were by best friend sitting on the couch at the end of the day.  I want to keep things real and part of being real is sharing the disappointments alongside the excitements.  I feel very fortunate that we are 9 weeks in and have yet to have any real issues.  Unfortunately that ended today.  As part of the structural changes to the space there were places where our wood floors would need to be patched to cover what was previously hidden areas (under previous cabinets, where the wall used to be at the now widened doorway from the hall into the kitchen.  We had several meetings before the project kicked off where we shared we had a partial box of the original hard wood floor remaining.  We also showed the box to the contractor during site visits.  We were assured that between that flooring and flooring recovered from under the cabinets there would be enough.  As I shared last week, it was determined there wasn't enough.  The onsite carpenter didn't remove any existing flooring from now hidden areas, and so all we had was the partial box.  So he went on a hunt for some matching flooring.  The sample he brought in seemed close to the same.  However, when he brought in a box you could see there was a difference in the colors.  I reviewed with him last Friday that I would expect the large space in the hallway/new entrance to be patched with the original wood and then weave in the space between the dishwasher and island withe remaining of the old with the new.

The workers were here most of the day Monday making more noise than any other part of the project, setting the fire alarm off twice due to dust from the saws, and I was so excited to go downstairs and see it.  After all, I had been assured several times during design these guys are good at what they do and you wouldn't be able to tell the floors were retrofitted, save for some possible above floor nail holes which would be small and puttied.  I was immediately stunned when I walked into the hallway and saw this (note all the blue tape is after the fact, but will play into the story):


To the left and up one board and 2 boards directly above the longest piece of blue tape you will see two 12" boards that are new.  No where in our floor pattern do we have short pieces in the middle of the pattern.  Also, it is with the new flooring and is much darker in person that it appears in this picture. The board noted on the left is also slightly higher than all the other boards all the way around it.  There are some variances in the flooring heights in our exiting floors, but no boards that sit up above the floor the way this one does.  So, short board, wrong color, too high... I wasn't happy.


I couldn't decide if the dull or bright picture showcases issue #2 more so you get both.  Basically because our old island only took up a small part of the kitchen and the rest was open w/ full flooring the original flooring is woven in between the counters and the island.  The new flooring however was laid as if we were laying new flooring in this area with no pattern...just cut the boards to fit and glue them down.  This is a huge fail in my book.  The floors should have been laid in a pattern to mimic the existing floor.  (Note: there are 6-7 planks toward the top of the picture that don't have seams like the ones at the bottom do, to explain this issue.) 

By the time the Mister got home from work I had convinced myself that I could live with this, I was overreacting, etc.  But he was not  It's very funny.  He's normally very calm, the voice of reason, etc. and I am the one who is all "this isn't perfect, my OCD can't handle this" insert more ranting and raving (by me.)  So when he wasn't happy with it, I knew we actually had a problem.  So I emailed the contractor, lead carepenter, and production supervisor to state our issues with this work.  I requested a meeting for Tuesday, but due to their unavailability we will be meeting with them on Wednesday.  To stress the importance of this, the Mister will actually be at this meeting in person.  He normally has me deal with the weekly meetings, so if you know us in real life you know that for him to leave work and come home for this meeting means it is a big deal.  

I am confident we will end up with a great solution and that our issues will  be addressed and resolved.  One of the reasons we chose the company we did was because of talking to other customers and hearing positives things about the final results.  I firmly believe that when you pay someone to do work for you they should do it as good as if not better they would do it in their own home.  They should make things seem seemless and like they have always been there.  So until Wednesday, I leave you with our current floors and the drama they have brought into our lives.  

Week 8 Day 5

Y'all, today brings one of the most exciting reveals of this whole remodel.  If you ask the Mister what he is excited about, this always ends up in the top 3, if not the #1 thing he will tell you.  Don't get me wrong, we both like to cook and are excited about everything in this space, but this splurge is fun, practical, and something I can with confidence say I don't think we will ever regret having installed.

So, I've made sure to document this command center portion of the kitchen because other than cookbooks on the bookshelves, this area is really non-kitchen in functionality.  The top cabinet will have glass doors to display some nice vases/dishes/etc.  The middle section is bookshelves for cookbooks, pictures, etc.  And the bottom cabinet.....
...will have his/hers drawers with built in plugs.  No more wallets, keys, phones, tablets on the countertop.  Come in, drop your stuff in your drawer, plug in items to charge, and shut them out of the way.  YAY!  When we first were told about this, the outlets were going to extend into the drawer a bit, but the electrician had barely enough space to squeeze these in to the back without losing a couple of inches of drawer space.  When choosing outlets, the original plan was to do one traditional outlet with two USBs in each box.  However, when reconsidering, we decided to do the configuration you see to the right.  We'll have one outlet box with 4 USB plugs.  The other will be a traditional outlet box with two 3-prong plugs.  USB seems to be the technology choice for chargers today, but in the event this isn't the case in 10 years, it is cheaper to then swap out one outlet box in each drawer than have to swap out all four.
As I eluded to in the post for yesterday's work, a lot of the work done by the electrician on this trip was behind the scenes...er cabinets.  Exhibit 1: plugs for the garbage disposal in the island.
Exhibit #2: a very blurry shot of the electrical for the cooktop

You know how at the end of movies they have outtakes?  This is a kitchen outtake for sure.  When they installed the microwave (which I didn't get a picture of for this post) they accidentally screwed this drawer closed.  I went to open it to show my mother-in-law the dividers in it and it was stuck...no amount of prying would open it.  The blue tape now has a note that details what has to happen to remedy this situation.  Bwa-ha-ha..oh the funny things that can happen when installing all the parts and pieces.

The fun part of opening the drawers is finding the storage being used for pieces of the kitchen not ready to be installed.  To the left (in a picture that even though I saved it in a rotated view refuses to upload correctly) is a shot of the filter panels for the ventilation hood. 

In the drawer to the right of the dishwasher are the shelves for the built in spice racks.


And now a shot of the living room built ins with the tops on and the doors closed.

Week 8 Day 4

It's electric..boogie woogie woogie.  It's funny the things you don't equate to needing a specific person to do until you find yourself in the midst of a major kitchen remodel.  The electrician was called out for a couple of days to do some behind the scenes work on items that are going to be very popular in this new kitchen.

The hood!  One of the items we went into this remodel wanting was a downdraft hood built in behind the cooktop.  After some coaching from our designer, we decided to go with a ceiling mounted hood.  During our appliance shopping trip we were able to see several hoods in action.  It turns out they have noise dampeners on them now, as well as variable CFM settings to meet code restrictions for kitchens.
 The code restrictions became a major point of stress during the design phase because our city requires a return draft for hoods over a certain CFM (cubic foot per minute.)  We really did not want to do this return draft after talking with someone who had one and how they didn't like it.  After some digging by our contractor we found out this hood can be set to a CFM limit below what would require a return draft.  This was a huge relief to both us!
The ovens are also hardwired into the electrical so these slid into place today as well.  Apparently they were larger than the cabinet so the back of the cabinet had to be cut out and slid forward a bit.  I need to get a good picture of this to show, but the slight change in elevation of this cabinet to the other cabinets is kind of neat in person.  It keeps the lower cabinets from looking flat all the way across.
 The oven racks are in the boxes shown here.  I can't wait for you to see them once installed.
Settings, settings, settings... we can proof, bake, roast, broil, convection broil, etc.
It is amazing to us to look at the shot below because the hood which we were concerned would overpower the space seems to just blend in and look like it belongs.  I think the combination of the larger windows, light cabinets and the soffit which makes the venting of the hood appear shorter all contribute to this just working out.  It's nice after all these weeks that we can see items come together and breathe a sigh of relief that we in fact love it and don't hate it.